MailChannels receives email from senders on the internet, filters it, and then passes it on to your mail servers, as shown in the diagram below:
To start processing your incoming email with MailChannels, you must first
- Tell the internet to send email to MailChannels by changing your "MX records"; and then
- Tell MailChannels where to deliver your email once it has been processed by setting up "Downstream records".
To get email flowing through MailChannels, complete the following steps to configure your Downstream and MX records:
- Go to the Settings page.
- Click on Configure Downstream Records panel to expand the panel if it isn't already.

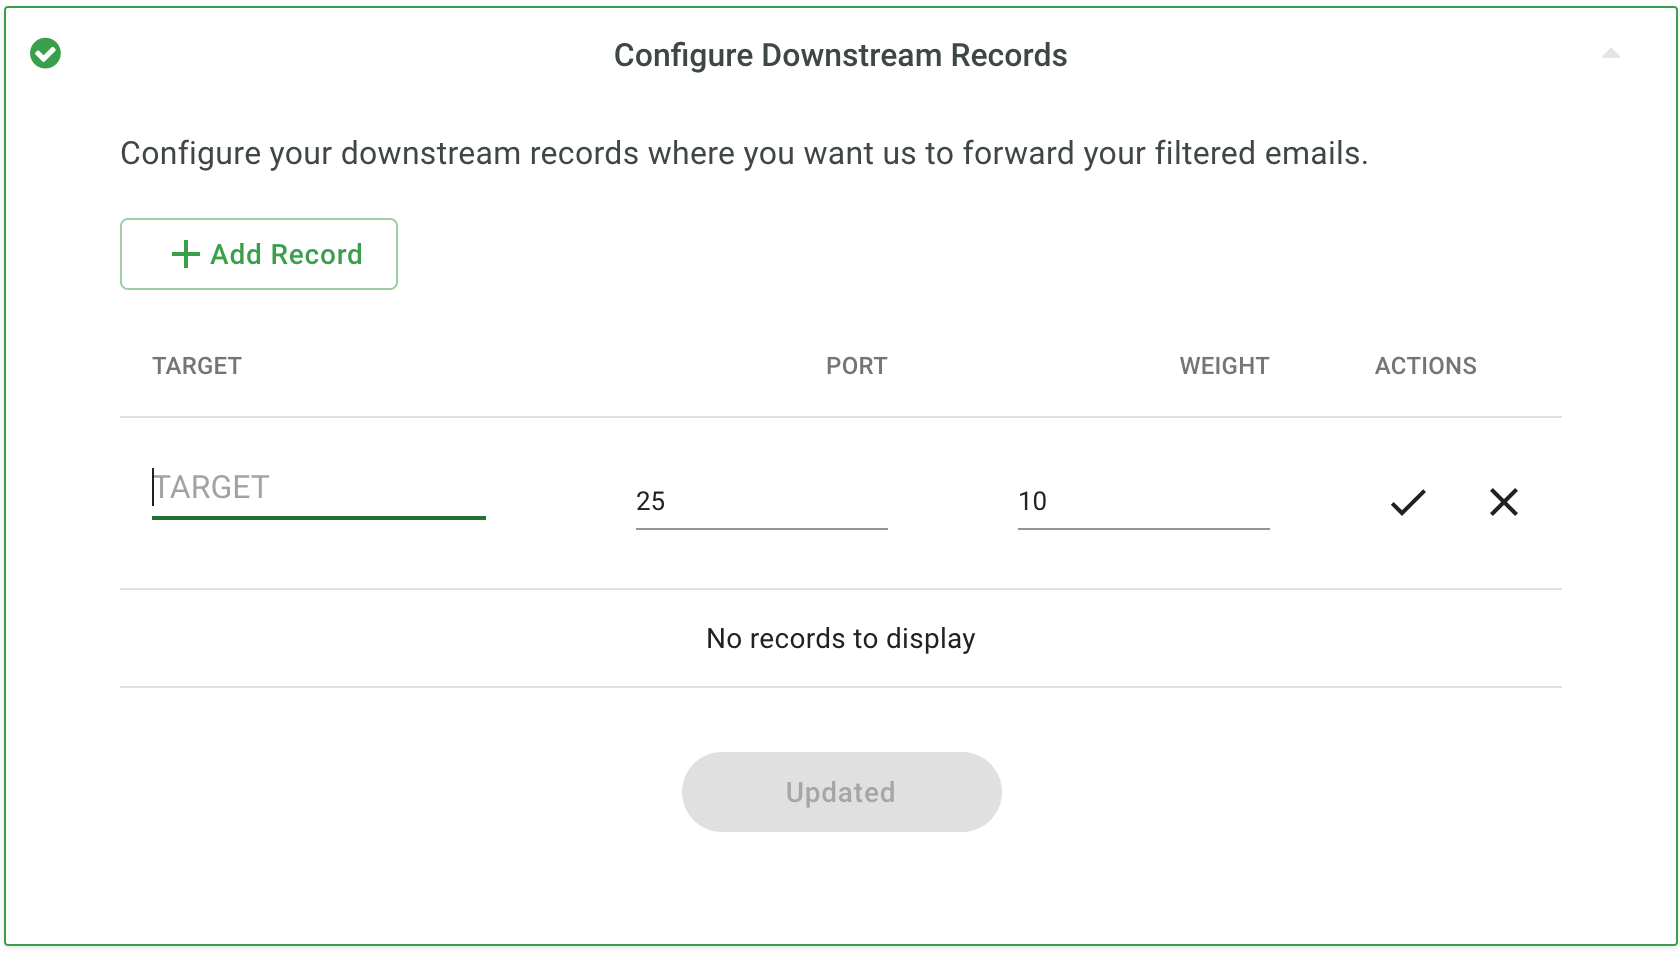
- Create the Downstream Record(s) using your current mail server hostname(s) in your domain DNS MX record(s).Enter your mail server hostname(s) into the form, one hostname per entry, by clicking on the "Add Record" button for each hostname. Click to save each entry after editing and when all hostname entries have been added, Click the Update button to validate your entries.
If you are unsure about Port and Weight, leave the default values as they will simply work. Add your mail server hostname(s) as the Downstream record target (This will be the same hostname used in your domain MX record(s) as the server destination target for your domain.)
Downstream validation is performed using the "postmaster" user @ the downstream server hostname target you provide. The "postmaster" user must exist for the validation check to pass and succeed in your host console settings area and is a required reserved account for every valid email domain as specified in RFC5321 Section 4.5.1:
Any system that includes an SMTP server supporting mail relaying or
   delivery MUST support the reserved mailbox "postmaster" as a case-
   insensitive local name.
If your host console will not validate your Downstream target record entry when you click to update, ensure that your target downstream host supports or contains a valid "postmaster" user and Update again once it has been enabled or added.
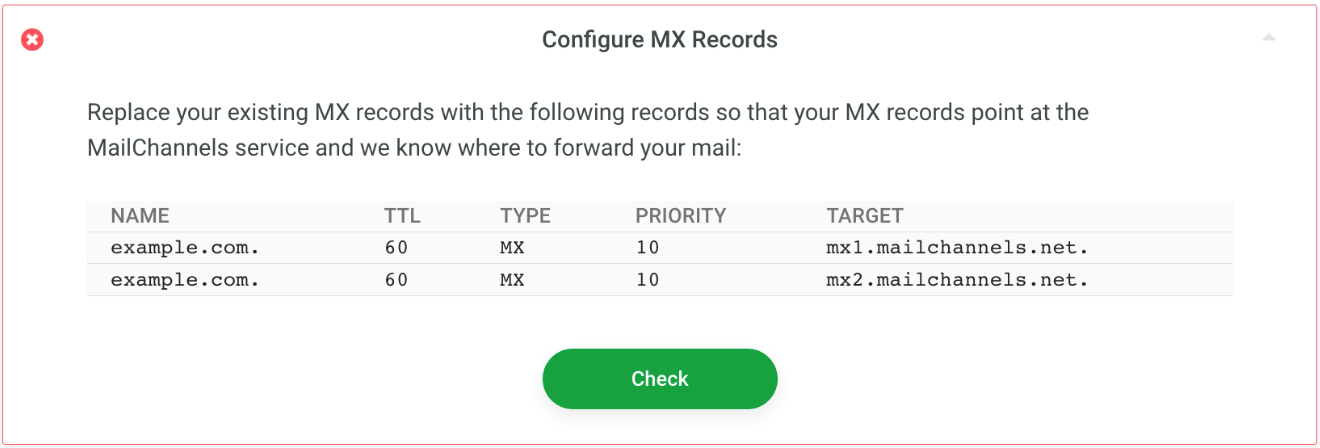
- Change your DNS MX Record(s) to match the example displayed when you click to open the Configure MX Records section of your Settings menu. Note, we used example.com as our domain in this guide.

- Once you replace your existing MX record(s) with the new mx1.mailchannels.net. and mx2.mailchannels.net. entries from the MX example in your host console, wait a few minutes for DNS to propagate your changes. Click on the "Check" button to validate your entries. If there is a problem you will receive an error and further guidance. You will receive the "Success" message when DNS returns with the two MailChannels destinations hostnames for your domain.

- You are finished updating Downstream and MX Records for MailChannels!
Comments
Article is closed for comments.